最近在学习手机方面的互动,发现不支持普通的js对DOM的操作,只能通过一些库里面的方法来实现。以下是我通过YUI的学习以及实例,大家可以通过以下内容去多了解。
Yahoo! UI Library (YUI) 是一个开放源代码的 JavaScript 函数库,为了能建立一个高互动的网页,它采用了AJAX, DHTML 和 DOM 等程式码技术。它也包含了许多 CSS 资源。使用授权为 BSD许可证
YUI 包含完整的说明文件。它包含了两种元件: 工具与控件,和一些 CSS 资源。
YUI 3.2.0 预览版最值得关注的改进包括:
支持触摸事件,包括点击和移动手势
按需加载代码,只加载运行时需要的js代码,加快运行速度
支持过渡动画模式,也就是说如果浏览器不支持CSS3,则使用 JavaScript 方法处理
升级了 CSS 表格,可进行更灵活的布局
新增了一个 ScrollView 部件,类似 Apple iOS
文件上传组件从 YUI2 变成 YUI3
HTML源代码如下:
<!DOCTYPE html>
<html lang="en">
<head>
<meta http-equiv="Content-Type" content="text/html; charset=gb2312" />
<title>支持手机的js的YUI库的几实例</title>
<script type="text/javascript" src="http://yui.yahooapis.com/3.14.1/build/yui/yui-min.js"></script>
<style>
.ht{background:#333;font-size:12px;height:25px;line-height:25px;text-indent:1em;box-shadow:0px 3px 4px #999;margin:5px 0;border-radius:3px;color:#fff;}
.intro{background:#f0f1f8;border:1px solid #d4d8eb;-moz-border-radius:3px;-webkit-border-radius:3px;border-radius:3px;padding:1em;font-size:12px;color:#f60;margin-bottom:5px;}
.example{margin-bottom:2em;-moz-border-radius:4px;-webkit-border-radius:4px;border-radius:4px;-moz-box-shadow:0 0 5px #bfbfbf;-webkit-box-shadow:0 0 5px #bfbfbf;box-shadow:0 0 5px #bfbfbf;padding:1em;border:1px solid #dfdfdf\9}
dl, ul, li {margin: 0;padding: 0;}
</style>
</head>
<body>
<p class="ht">RGB 滑块--RGB Slider</p>
<div class="example">
<div class="intro">使用三个滑块控制 RGB 值并更新十六进制和 HSL 字符串。</div>
<style>
.sliders{display:inline-block;zoom:1;*display:inline;width:210px;vertical-align:middle;overflow:hidden;}
.color{display:inline-block;zoom:1;*display:inline;width:100px;height:100px;border:1px solid rgba(0,0,0,0.5);-webkit-box-shadow:1px 1px 2px 0px rgba(0,0,0,0.3);-moz-box-shadow:1px 1px 2px 0px rgba(0,0,0,0.3);box-shadow:1px 1px 2px 0px rgba(0,0,0,0.3);margin:0 20px;vertical-align:middle;}
.output{display:inline-block;zoom:1;*display:inline;vertical-align:middle;overflow:hidden;}
.sliders dt,.output dt{float:left;clear:left;width:50px;height:40px;line-height:40px;}
.sliders dd,.output dd{float:left;height:40px;line-height:40px;margin:0;}
.yui3-slider,.yui3-slider-rail{display:-moz-inline-stack;display:inline-block;*display:inline;zoom:1;vertical-align:middle}
.yui3-slider-content{position:relative;display:block}
.yui3-slider-rail{position:relative}
.yui3-slider-rail-cap-top,.yui3-slider-rail-cap-left,.yui3-slider-rail-cap-bottom,.yui3-slider-rail-cap-right,.yui3-slider-thumb,.yui3-slider-thumb-image,.yui3-slider-thumb-shadow{position:absolute}
.yui3-slider-thumb{overflow:hidden}
.yui3-skin-sam .yui3-slider-x .yui3-slider-rail,.yui3-skin-sam .yui3-slider-x .yui3-slider-rail-cap-left,.yui3-skin-sam .yui3-slider-x .yui3-slider-rail-cap-right{background-image:url(http://yui.yahooapis.com/3.14.1/build/slider-base/assets/skins/sam/rail-x.png);background-repeat:repeat-x}
.yui3-skin-sam .yui3-slider-x .yui3-slider-rail{height:26px}
.yui3-skin-sam .yui3-slider-x .yui3-slider-thumb{height:26px;width:15px}
.yui3-skin-sam .yui3-slider-x .yui3-slider-rail-cap-left{background-position:0 -20px;height:20px;left:-2px;width:5px}
.yui3-skin-sam .yui3-slider-x .yui3-slider-rail-cap-right{background-position:0 -40px;height:20px;right:-2px;width:5px}
.yui3-skin-sam .yui3-slider-x .yui3-slider-thumb-image{left:0;top:-10px}
.yui3-skin-sam .yui3-slider-x .yui3-slider-thumb-shadow{left:0;opacity:.15;filter:alpha(opacity=15);top:-50px}
.yui3-skin-sam .yui3-slider-y .yui3-slider-rail,.yui3-skin-sam .yui3-slider-y .yui3-slider-rail-cap-top,.yui3-skin-sam .yui3-slider-y .yui3-slider-rail-cap-bottom{background-image:url(http://yui.yahooapis.com/3.14.1/build/slider-base/assets/skins/sam/rail-y.png);background-repeat:repeat-y}
.yui3-skin-sam .yui3-slider-y .yui3-slider-rail{width:26px}
.yui3-skin-sam .yui3-slider-y .yui3-slider-thumb{width:26px;height:15px}
.yui3-skin-sam .yui3-slider-y .yui3-slider-rail-cap-top{background-position:-20px 0;width:20px;top:-2px;height:5px}
.yui3-skin-sam .yui3-slider-y .yui3-slider-rail-cap-bottom{background-position:-40px 0;width:20px;bottom:-2px;height:5px}
.yui3-skin-sam .yui3-slider-y .yui3-slider-thumb-image{left:-10px;top:0}
.yui3-skin-sam .yui3-slider-y .yui3-slider-thumb-shadow{left:-50px;opacity:.15;filter:alpha(opacity=15);top:0}
#yui3-css-stamp.skin-sam-slider-base{display:none}
</style>
<div class="sliders yui3-skin-sam">
<dl>
<dt>R: <span id="r-val" class="val"></span></dt><dd id="r-slider"></dd>
<dt>G: <span id="g-val" class="val"></span></dt><dd id="g-slider"></dd>
<dt>B: <span id="b-val" class="val"></span></dt><dd id="b-slider"></dd>
</dl>
</div>
<div class="color"></div>
<div class="output">
<dl>
<dt>Hex:</dt><dd id="hex"></dd>
<dt>RGB:</dt><dd id="rgb"></dd>
<dt>HSL:</dt><dd id="hsl"></dd>
</dl>
</div>
<script>
YUI().use("slider", "color", function(Y){
// sliders
var rSlider = new Y.Slider({ min: 0, max: 255, value: Math.round(Math.random()*255) }),
gSlider = new Y.Slider({ min: 0, max: 255, value: Math.round(Math.random()*255) }),
bSlider = new Y.Slider({ min: 0, max: 255, value: Math.round(Math.random()*255) }),
// slider values
rVal = Y.one("#r-val"),
gVal = Y.one("#g-val"),
bVal = Y.one("#b-val"),
// color strings
hex = Y.one("#hex"),
rgb = Y.one("#rgb"),
hsl = Y.one("#hsl"),
// color chip
color = Y.one(".color");
// render sliders
rSlider.render("#r-slider");
gSlider.render("#g-slider");
bSlider.render("#b-slider");
// register update events
rSlider.after("thumbMove", function(e) {
rVal.set("text", rSlider.get("value"));
updateColors();
});
gSlider.after("thumbMove", function(e) {
gVal.set("text", gSlider.get("value"));
updateColors();
});
bSlider.after("thumbMove", function(e) {
bVal.set("text", bSlider.get("value"));
updateColors();
});
// update the colors strings
function updateColors() {
var r = rSlider.get("value"),
g = gSlider.get("value"),
b = bSlider.get("value"),
rgbStr = Y.Color.fromArray([r,g,b], Y.Color.TYPES.RGB);
color.setStyle("backgroundColor", rgbStr);
rgb.set("text", rgbStr);
hex.set("text", Y.Color.toHex(rgbStr));
hsl.set("text", Y.Color.toHSL(rgbStr));
}
rVal.set("text", rSlider.get("value"));
gVal.set("text", gSlider.get("value"));
bVal.set("text", bSlider.get("value"));
updateColors();
});
</script>
</div>
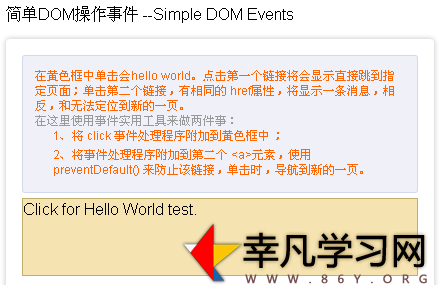
<p class="ht">简单DOM操作事件 --Simple DOM Events </p>
<div id="demo" class="example">
<style>
#container {background-color:#F5E3B1;border: 1px solid #C2AE6D;height: 76px;/*padding: 1em 0 0 1em;*/cursor: pointer;}
#demo .hello {background:#000 url(http://yuilibrary.com/yui/docs/assets/event/earth.png) no-repeat scroll 141px -62px ;color: #C3A7CD;border-color: #000;font-size: 150%;}
#container p{margin:0;padding:0;}
.message {visibility: hidden;}
</style>
<div class="intro">在黄色框中单击会hello world。点击第一个链接将会显示直接跳到指定页面;单击第二个链接,有相同的 href属性,将显示一条消息,相反,和无法定位到新的一页。
<dl><dt>在这里使用事件实用工具来做两件事:</dt>
<dd>1、将 click 事件处理程序附加到黄色框中 ;</dd>
<dd>2、将事件处理程序附加到第二个 <a>元素,使用 preventDefault() 来防止该链接,单击时,导航到新的一页。</dd></dl></div>
<div id="container">
<p>Click for Hello World test.</p>
</div>
<p><a href="http://yuilibrary.com" id="firstA">The YUI Library. (Link navigates away from page.)</a></p>
<a href="http://yuilibrary.com" id="secondA">The YUI Library. (Link"s default behavior is suppressed.)</a>
<div class="message">
When you clicked on the second link, *preventDefault* was called, so it did not navigate away from the page.
</div>
<script>
YUI().use("node", function (Y) {
// A function that gives hello world feedback:
var helloWorld = function(e) {
e.target.setHTML("<p>Hello World!</p>");
Y.one("#container").addClass("hello");
}
// subscribe the helloWorld function as an event handler for the click
// event on the container div:
var node = Y.one("#container");
node.on("click", helloWorld);
// A function that displays a message and prevents the default behavior of
// the event for which it is a handler:
var interceptLink = function(e) {
e.preventDefault();
Y.one(".message").setStyle("visibility", "visible");
}
// subscribe our interceptLink function as a click handler for the second
// anchor element:
Y.one("#secondA").on("click", interceptLink);
});
</script>
</div>
<p class="ht">使用简单的节点列表---Using NodeList - Simple</p>
<div class="example">
<style>
.box-row li{display: inline-block;zoom:1; *display: inline; /* IE < 8: fake inline-block */width:100px;line-height: 3em;text-align: center;margin: 0.5em 1em 0.5em 0;border:solid 1px #ccc;background-color:#F4E6B8;cursor:pointer;}
</style>
<div class="intro">此示例演示如何使用一个节点列表实例要使它易于进行一次操作多个节点。</div>
Click us.
<ul class="box-row">
<li>box</li>
<li>box</li>
<li>box</li>
<li>box</li>
<li>box</li>
</ul>
<script>
YUI().use("node", function(Y){
var boxes = Y.all(".box-row li");
var handleBoxClick = function(e) {
// boxes is a NodeList
boxes.setHTML("neener");
boxes.setStyle("backgroundColor", "#F4E6B8");
// e.currentTarget === .box-row li, just the one that was clicked
e.currentTarget.setHTML("ouch!");
e.currentTarget.setStyle("backgroundColor", "#C4DAED");
};
Y.one(".box-row").delegate("click", handleBoxClick, "li");
});
</script>
</div>
<p class="ht">设置/获取属性值--Set and Get Properties</p>
<div class="example">
<style>
.example #corn{position: relative;background: url(http://yuilibrary.com/yui/docs/assets/node/images/corn.jpg);width: 232px;height:181px;-moz-box-shadow: 3px 3px 12px rgba(0, 0, 0, 0.4);-webkit-box-shadow: 3px 3px 12px rgba(0, 0, 0, 0.4);margin: 2px 0 1em;border: none;}
.example #ruler{width: 650px;height: 42px;background: url(http://yuilibrary.com/yui/docs/assets/node/images/ruler_ticks.png) repeat-x scroll -1px 24px #DDCEB7;}
.example .yui3-button {margin: 0 0.2em;}
.example .btn-get{margin-left: 4em;}
#input {height: 1.6em;width: 4em;}
#output{position: absolute;top: -40px;width: 100px;height: 40px;right: -50px;text-align: center;cursor: pointer;}
#corn .ruler-marker{position: absolute;top: -20px;right: 0;height: 30px;border-right: solid 1px #f00;}
</style>
<div class="intro">此示例演示如何检索和使用一个节点实例并访问 DOM 属性。<br />按下一个按钮,用于获取或设置包含玉米图像的 div 的 offsetWidth。</div>
<div id="ruler"></div>
<div id="corn">
<div class="ruler-marker"></div>
<div id="output">? px</div>
</div>
<label>Width:</label>
<input value="550" size="2" id="input"> px
<button class="yui3-button btn-set">Set</button>
<button class="yui3-button btn-get">Get</button>
<script>
YUI().use("node", "button", function(Y) {
var corn = Y.one("#corn"),
input = Y.one(".example #input"),
output = Y.one(".example #output");
var getWidth = function(){
var width = corn.get("offsetWidth");
output.setHTML(width + "px"); // display width near the get button
}
Y.one(".example .btn-get").on("click", getWidth);
output.on("click", getWidth); // also allows getting width by clicking on ruler width label
Y.one(".example .btn-set").on("click", function(e) {
var value = input.get("value"),
width = corn.get("offsetWidth");
if (value == "") {
input.set("value", width);
} else if (!isNaN(parseInt(value))) { // if the value in the input is a number
corn.set("offsetWidth", value);
output.setHTML("? " + "px"); // clear out the width label on the ruler
}
});
});
</script>
</div>
<p class="ht">DOM 方法--DOM Methods</p>
<div class="example">
<div class="intro">单击任何一个蓝框,将复制到其他的堆栈。<br />单击框中其他堆栈,以将其完全删除。</div>
<style>
dl, ul, li {
margin: 0;
padding: 0;
}
ul#demoa li {
border:1px solid #7a97bb;
}
div#demoa ,
ul#demoa ,
form#demoa {
background:#D4D8EB;
border:1px solid #7a97bb;
}
ul#demob {
border:1px solid #999;
margin-left: 1em;
}
form#demoa {
padding: 1em;
}
ul#demob li {
background: #dadada;
border: 1px solid #999;
}
ul#demoa li,
ul#demob li {
list-style: none;
padding: 1em;
zoom:1;
}
ul#demoa ,
ul#demob {
width: 10em;
display: inline-block;
zoom: 1;
*display: inline;
list-style: none outside none;
}
.yui3-fail {
background:red;
}
#demoa .yui3-pass,
#demob .yui3-pass {
background:green;
}
#demoa dt {
font-weight:bold;
}
#demoa dt::after {
content:":";
}
#demoa dl {
padding:1em;
}
#demoa dd {
margin-bottom:0.5em;
}
span#demoa {
background:#ffa928;
display:block;
height:10px;
width:10px;
box-shadow: 2px 2px 3px rgba(0, 0, 0, 0.25);
}
.highlight {
background: #FFB367;
}
.yui3-data-win, .yui3-data-doc {
cursor:pointer;
}
#demoa -stage {
background: #eee;
height: 400px;
}
.example ul {
vertical-align: top;
}
</style>
<ul id="demoa">
<li>Dog</li>
<li>Cat</li>
<li>Fish</li>
<li>Bird</li>
</ul>
<ul id="demob">
<li>Wheelbarrow</li>
<li>Ice Cream Cone</li>
</ul>
<script type="text/javascript">
YUI().use("node", function(Y) {
var list2 = Y.one("#demob");
var onList1Click = function(e) {
var item = e.currentTarget;
if (list2.getStyle("display") === "none") {
list2.show();
}
list2.append(item.cloneNode(true));
};
var onList2Click = function(e) {
var item = e.currentTarget;
item.remove(); // sugar for item.get("parentNode").removeChild(item);
if (list2.all("li").size() < 1) { // hide the list if its empty
list2.hide();
}
};
Y.one("#demoa").delegate("click", onList1Click, "li");
Y.one("#demob").delegate("click", onList2Click, "li");
});
</script>
</div>
<p class="ht">处理 DOM 事件--Handling DOM Events</p>
<div class="example">
<style>
#containerA{font-size:200%;cursor:pointer;padding:0 0.5em;margin-bottom:0.3em;border-bottom:solid 1px #ccc;text-align:center;}
#containerA em{color:red;font-weight:bold;font-size:130%;}
#containerA strong{color:green;font-weight:bold;font-family:arial black;}
#containerA code{background-color:#000;color:#CEFFA2;padding:0.3em;font-weight:bold;font-family:Courier,monospace;}
#containerA a{color:#00f;padding:0.3em;text-decoration:underline;font-family:verdana;}
.example .dd-color{height:1em;width:3em;}
.example dt{font-weight:normal;color:#999;}
</style>
<div class="intro">此示例演示如何从一个节点实例对 DOM 事件做出响应。<br />单击其中一个元素将报告一些事件的详细信息。</div>
<div id="containerA">
<p><em>emphasis</em> <code>code</code> <strong>strong</strong> <a>anchor</a> <img src="http://yuilibrary.com/yui/docs/assets/node/images/birds.png" align="middle"/></p>
</div>
<div id="event-resultA">Click an element above to see its event data.</div>
<script type="text/javascript">
YUI().use("node", function(Y) {
var onClick = function(e) {
var type = e.type,
currentTarget = e.currentTarget, // #container
target = e.target; // #container or a descendant
Y.one("#event-resultA").setHTML("<dl>" +
"<dt>Event Type: </dt>" +
"<dd>" + e.type + "</dd>" +
"<dt>Target Tag Name: </dt>" +
"<dd>" + target.get("tagName") + "</dd>" +
"<dt>Color of Target\"s Font: </dt>" +
"<div class=\"dd-color\" style=\"background-color:" + target.getComputedStyle("color") + ";\">" + "</div>" +
"<dt>CurrentTarget Tag Name & Id: </dt>" +
"<dd>" + currentTarget.get("tagName") + "#" + currentTarget.get("id") + "</dd>" +
"</dl>");
};
Y.one("#containerA").on("click", onClick);
Y.one("#containerA").on("dblclick", onClick);
});
</script>
</div>
<p class="ht">幻灯片放映--Slideshow</p>
<div class="example">
<style scoped>
#spiffySlides {position:relative;overflow:hidden;display:inline-block;zoom:1;*display:inline;}
/* - S L I D E S - */
#spiffySlides .slides {margin:0;padding:0;width:630px;height:350px;position:relative;box-shadow:0 0 3px hsla(250, 40%, 30%, 0.8);}
#spiffySlides .slides li {position:absolute;left:0;top:0;list-style:none;display:inline;opacity:0;filter:alpha(opacity=0);-webkit-transition:opacity 0.3s ease-out;-moz-transition:opacity 0.3s ease-out;-o-transition:opacity 0.3s ease-out;transition:opacity 0.3s ease-out;}
#spiffySlides .slides .active {opacity:1;filter:alpha(opacity=100);-webkit-transition:opacity 0.3s ease-out;-moz-transition:opacity 0.3s ease-out;-o-transition:opacity 0.3s ease-out;transition:opacity 0.3s ease-out;}
/* - C O N T R O L S - */
#spiffySlides .controls {width:630px;text-align:right;margin:3px 0 0;padding:8px 0 0;position:relative;z-index:1;}
#spiffySlides .controls li {list-style:none;display:inline;}
#spiffySlides .controls a {display:inline-block;zoom:1;*display:inline;padding:0 10px;border:solid 1px #CBCBCB;text-decoration:none;line-height:1.7em;color:#4A4A4A;font-family:arial,san-serif;}
#spiffySlides.circles .controls a {text-indent:100px;overflow:hidden;border-radius:50%;width:12px;height:12px;padding:0;}
#spiffySlides .controls a:hover {background-color:#bfdaff;color:#000;}
#spiffySlides .controls .active a,
#spiffySlides .controls .active a:hover {background:#2647a0;color:#ffffff;}
/* - P A U S E M E S S A G E - */
#spiffySlides .paused {opacity:0;filter:alpha(opacity=0);bottom:5px;left:-130px;letter-spacing:18px;position:absolute;color:#2a2a2a;width:630px;line-height:1.8em;-webkit-transition:all 0.3s ease-out;-moz-transition:all 0.3s ease-out;-o-transition:all 0.3s ease-out;transition:all 0.3s ease-out;}
#spiffySlides:hover .paused {opacity:1;filter:alpha(opacity=100);left:30px;letter-spacing:1px;-webkit-transition:all 0.3s ease-out;-moz-transition:all 0.3s ease-out;-o-transition:all 0.3s ease-out;transition:all 0.3s ease-out;}
</style>
<div class="intro">此示例说明了如何创建使用分页程序来控制幻灯片的幻灯片显示。</div>
<div id="spiffySlides">
<ul class="slides">
<li class="active">
<img src="http://yuilibrary.com/yui/docs/assets/paginator/images/1.jpg">
</li>
<li>
<img src="http://yuilibrary.com/yui/docs/assets/paginator/images/2.jpg">
</li>
<li>
<img src="http://yuilibrary.com/yui/docs/assets/paginator/images/3.jpg">
</li>
<li>
<img src="http://yuilibrary.com/yui/docs/assets/paginator/images/4.jpg">
</li>
<li>
<img src="http://yuilibrary.com/yui/docs/assets/paginator/images/5.jpg">
</li>
</ul>
<ul class="controls">
<li class="active"><a href="#slide-1">1</a></li>
<li><a href="#slide-2">2</a></li>
<li><a href="#slide-3">3</a></li>
<li><a href="#slide-4">4</a></li>
<li><a href="#slide-5">5</a></li>
</ul>
<div class="paused">paused...</div>
</div>
<script>
YUI().use("node", "paginator", "event-hover", "gallery-timer", function (Y) {
var spiffy = Y.one("#spiffySlides"),
slides = spiffy.all(".slides li"),
controls = spiffy.all(".controls li"),
selectedClass = "active",
pg = new Y.Paginator({
itemsPerPage: 1,
totalItems: slides.size()
});
pg.after("pageChange", function (e) {
var page = e.newVal;
// decrement page since nodeLists are 0 based and
// paginator is 1 based
page--;
// clear anything active
slides.removeClass(selectedClass);
controls.removeClass(selectedClass);
// make the new item active
slides.item(page).addClass(selectedClass);
controls.item(page).addClass(selectedClass);
});
// when we click the control links we want to go to that slide
spiffy.delegate("click", function (e) {
e.preventDefault();
var control = e.currentTarget;
// if it"s already active, do nothing
if (control.ancestor("li").hasClass(selectedClass)) {
return;
}
pg.set("page", parseInt(control.getHTML(), 10));
}, ".controls a");
// create a timer to go to the next slide automatically
// we use timer to obtain a pause/resume relationship
autoPlay = new Y.Timer({
length: 2500,
repeatCount: 0});
autoPlay.after("timer", function (e) {
if (pg.hasNextPage()) {
pg.nextPage();
} else {
pg.set("page", 1);
}
});
// start the autoPlay timer
autoPlay.start();
// we want to pause when we mouse over the slide show
// and resume when we mouse out
spiffy.on("hover", function (e) {
autoPlay.pause()
}, function (e) {
autoPlay.resume()
});
});
</script>
</div>
</body>
</html>
更多关于支持手机javascript实例>>YUI Examples
大家有什么问题或技术上的想法可以在此与大家分享,也可以加入前端爱好者QQ群(141999928)一起学习进步:
【幸凡前端技术交流群】
如果您觉得本文的内容对您的学习有所帮助,捐赠与共勉,支付宝(左)或微信(右)